Advanced features
In this tutorial, we will show you some of LabelJoy’s advanced features. These features can be very important when working with labels.
Topics covered:
- Print start position
- Layout subdivision
- Counters, References and formatting
- Commands for multiple selection
Print start position
Labeljoy enables you to define a printing start position on the first page, other than the top-left position normally used when printing multiple row/column label sheets. This feature is particularly useful when you want to start your printing job on a label sheet that is partially used, enabling you to fully use all those label sheets that have not been completely used.
You can define the start position of the printing job by entering the Define start position mode using the dedicated toolbar button:

Once you have entered the Define start position mode just click on the label position where you want the printing to start.
The image above shows a 6 by 3 label sheet with the print start position set at position # 5 (2nd row, 2nd column). This was obtained by clicking on position # 5 while the cursor was in Define start position mode.
Once the start position has been defined, the cursor will revert to default mode.
To return to a fully printed first page, click the Define Start Position button and click Position # 1, top row, left column.
The print start position can also be set in the Print tab of the Option form:
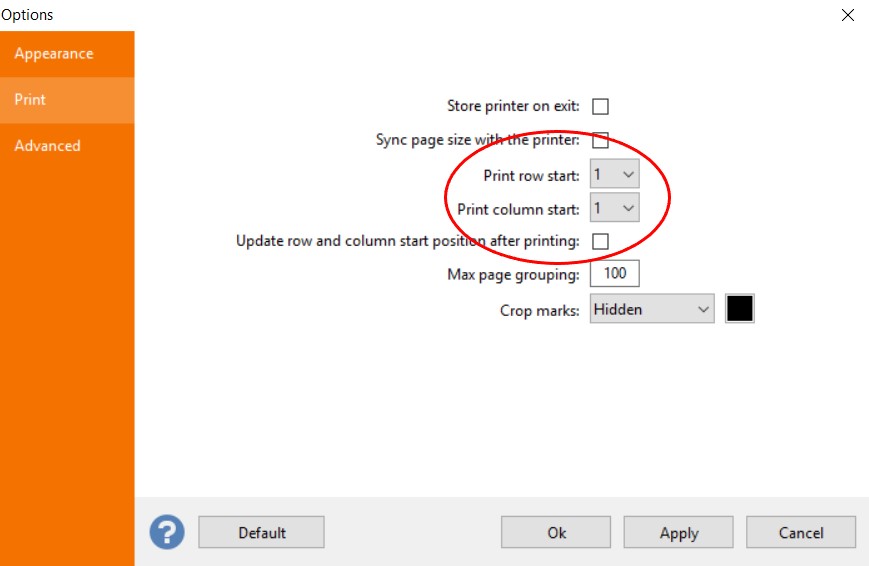
Here you can also toggle the Update row and column start position after printing option. This way, each time Labeljoy successfully ends a printing job, it will automatically set the print start position for the current file to the proper label location, in case the last sheet was not completely used.
Note: the print start position setting only affects the first page. All subsequent pages are completely printed, except for the last of course, if not all label positions have to be printed.
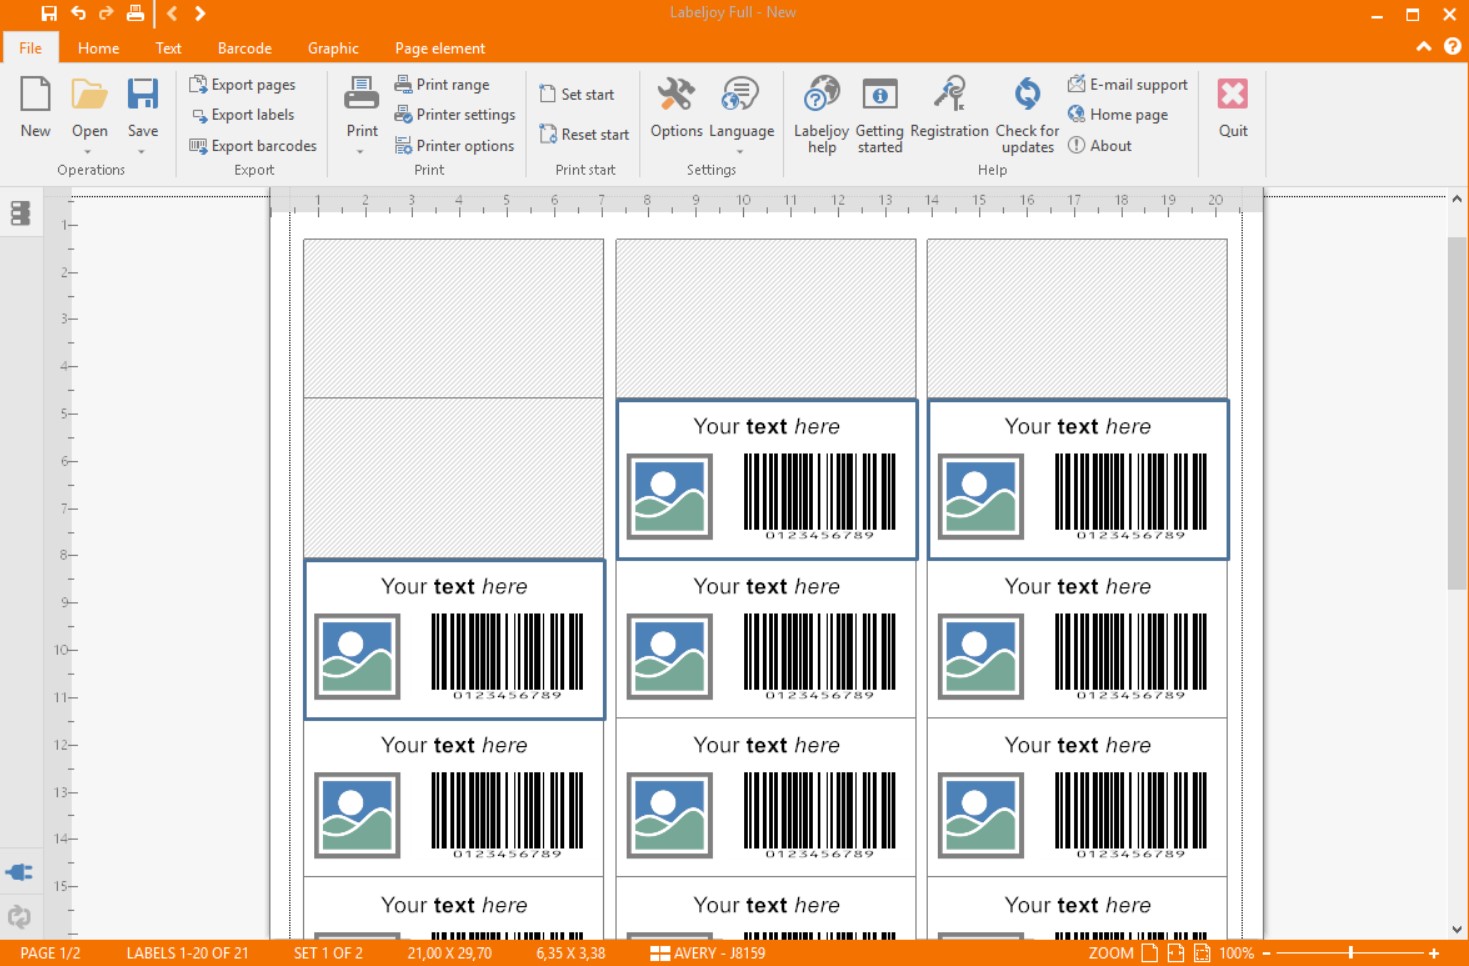
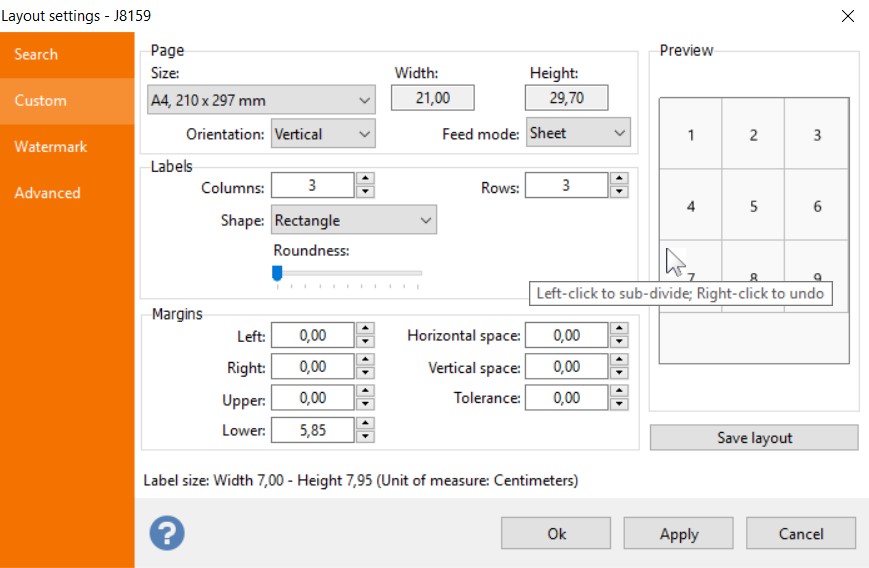
Layout subdivision
This feature allows you to override any limitations of the printers to print on the lower section of the paper – caused by physical limitations of the drive rollers – so that the entire surface of the paper can be printed. In label printing, this limitation can lead to a great waste of material.
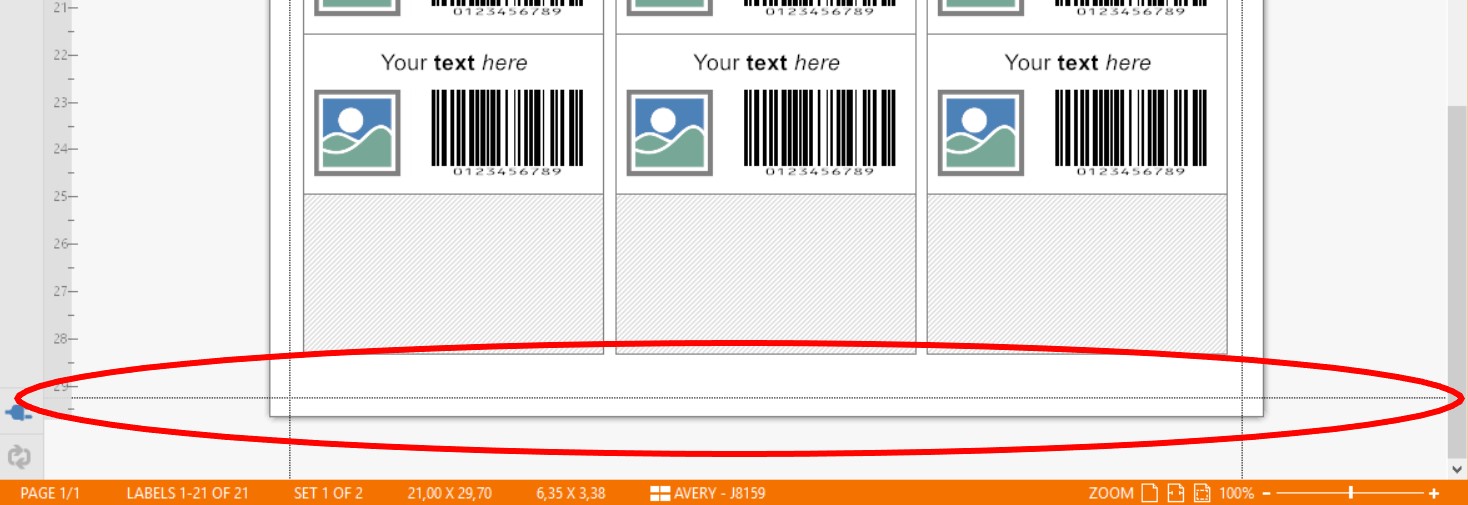
The previous image shows the bottom of the page in Labeljoy. The lower print margin is highlighted in red and indicates the limit of the printable area as reported by the printer being used. As you can see, the bottom margin in this layout makes it difficult to use the last row. If the label design should display data from an external data source at this point, there is a great risk of data loss.
Labeljoy offers a solution to this problem by allowing you to change the layout to print label sheets twice: the first time the top half of the sheet is printed and the second time the same sheet is rotated 180 degrees. In this way, printing always takes place on the top half of the sheet, where no physical margin issues occur.
You can instruct Labeljoy to create a new layout, based on the current one, with labels placed only in the upper section of the sheet. The new layout will have a smaller number of rows (normally half) and the lower margin will be adjusted so that the resulting label size will remain unchanged.
Open the Layout form and select the Custom tab. The right panel shows the layout preview and if you place the mouse pointer over it, the tool tip text will show Left-click to sub-divide; Right-click to undo. What this mean is: click with the left mouse button on a layout row to make it the last row and adjust the lower margin so that the label size of the remaining rows won’t be affected. Right-click the preview to go back to the original layout design.
The image above shows what happens to our layout when we click on the fourth row: We go from 6 to 3 rows while the bottom margin is increased to compensate for the 3 missing rows. The label height remains unchanged.
If you print your labels using this layout, only the upper half of the sheet will be used. You can then re-insert these sheets in the printer, rotating them by 180 degrees to print again on the other half of the sheet.
No labels will be wasted.
Counters, references and formatting
Since version 5, Labeljoy features a powerful text concatenation functionality that enables you to create dynamic texts containing not only database fields but also counters and environmental references.
Counters, as the name implies, are variable elements that can vary on any label with an ascending or descending value and can take the form of a simple numeric number or a slightly more complex alpha-numeric or hexadecimal figure.
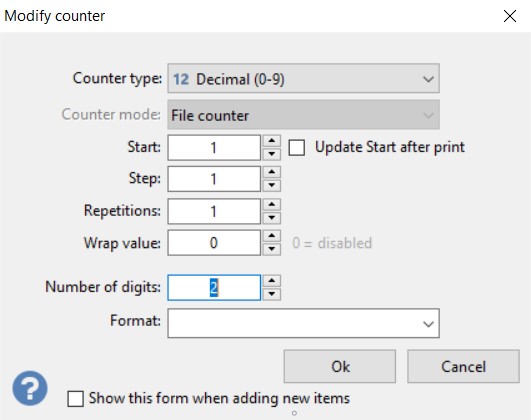
Start Labeljoy and double-click to edit the text element (or any other text element) to see how counters work. Remove the default text and click on the Counter button. Select the first item from the pop-up menu to add a simple decimal counter (0-9). If it does not open automatically, click on the newly added counter text to display the property form:
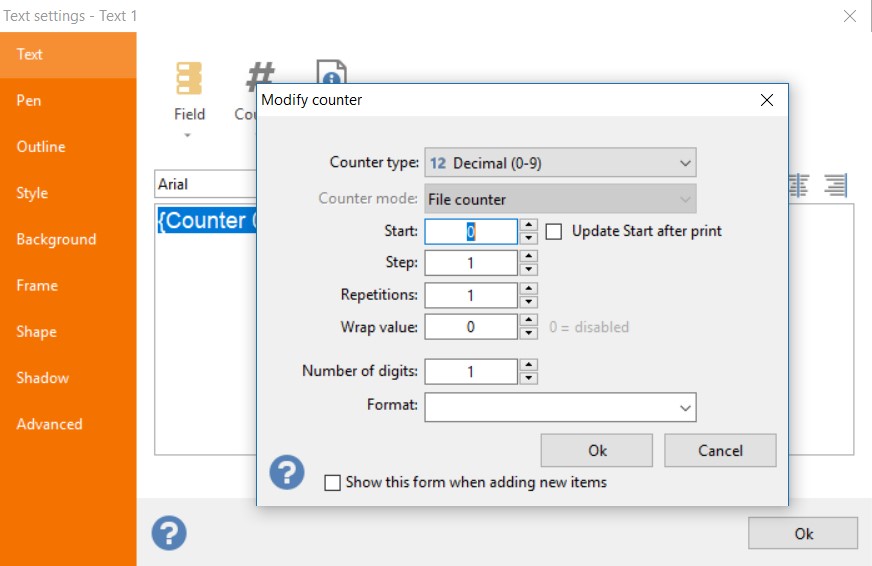
Here is a brief description of the meaning of each field:
- Start: enter the initial value of the counter in this text box. The value entered here is always numeric, even if you have selected a counter with alphanumeric characters. This value may be a negative number.
- Step: enter the value by which each position will be incremented. For example, by entering 5, each label will show the counter incremented by 5 units. This value may be a negative number.
- Number of digits: the minimum number of digits shown in the text. For example, by entering 5 the counter will be shown as 00001, 00002, 00003 etc.
- Counter type: Combo box to change the selected counter type from 6 available options:
- Decimal: base 10 counter using digits between 0 and 9.
- Upper case alpha-numeric: base 36 counter using digits between 0 and 9 and the 26 upper case letters from A to Z.
- Lower case alpha-numeric: base 36 counter using digits between 0 and 9 and the 26 lower case letters from a to z.
- Upper case alphabetic: base 26 counter using only the 26 upper case letters from A to Z.
- Lower case alphabetic: base 26 counter using only the 26 lower case letters from a to z.
- Hexadecimal: base 16 counter using digits between 0 and 9 and upper case letters A to F.
- Format: format to be applied to the value read from the data source (optional). You can select a predefined format from the list or enter a custom format.
Just enter 1 in the field Start, 1 in the field Step and leave everything else unchanged, then click twice on Ok, once in this property form and the second time in the text editor form. As you can see, your text on the labels is now a number that starts at 1 and increases by 1 unit on each label.
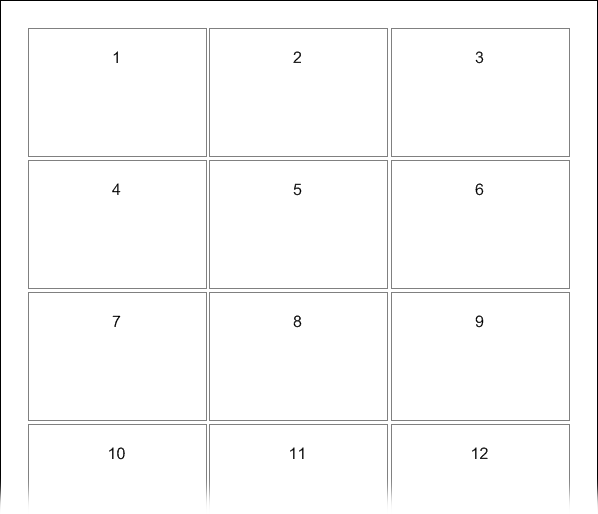
Now we take one step further and add a text to this number. For this example we assume that we create a box numbering label.
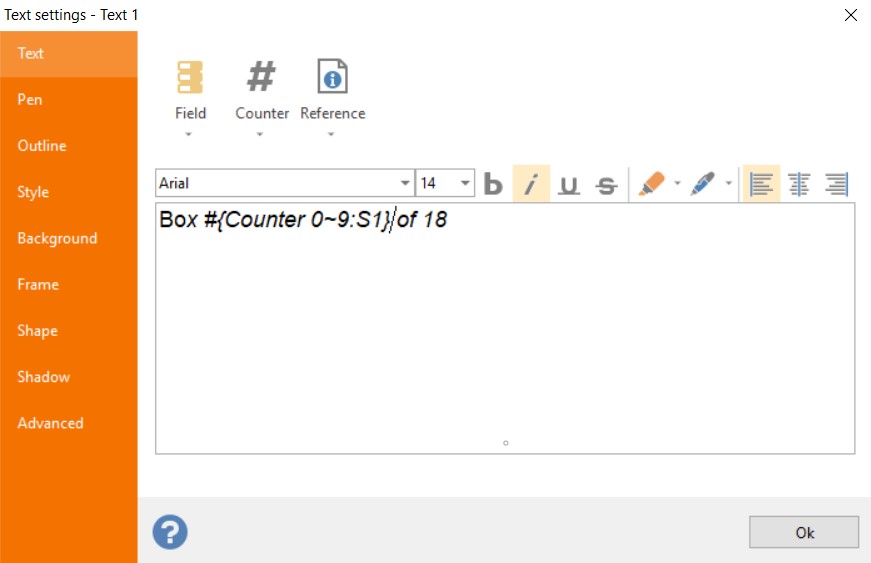
Double-click the text element and add the text shown in the following image.
This looks fine, but since we are printing more the 9 labels, we want all the counter numbers to have the same amount of digits. We exit the preview mode by clicking the preview button again and click the Counter text to bring up its properties form again. We then change the value in the Number of digits field and enter 2:
And this is the final result:

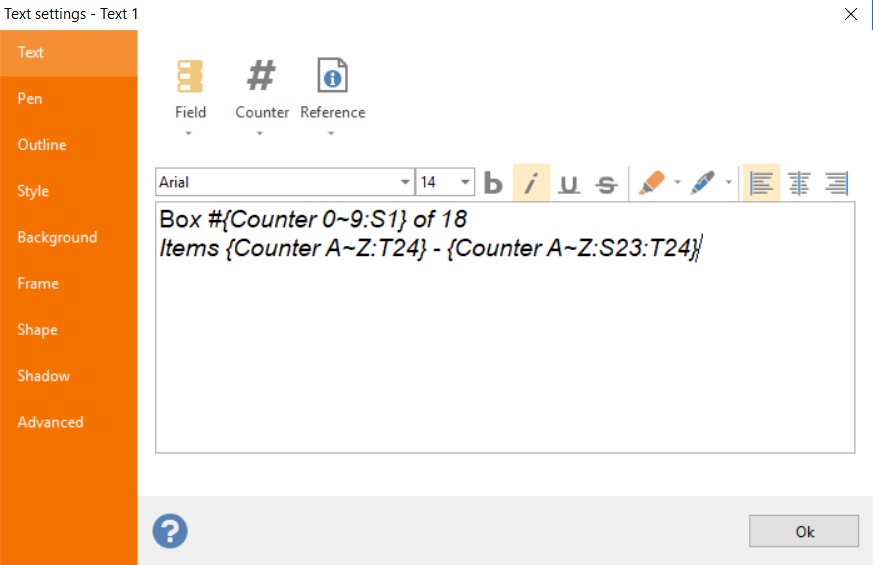
Let’s go one step further by adding a new counter object to the text element that displays information about the items contained in each box. Assume the boxes contain 24 articles, each numbered with an alphabetic coding in the range from AA to ZZ.
Double click the text to edit it, add the text Items followed by a new Upper case alphabetic counter, a space and another Upper case alphabetic counter. Click the first newly added counter to set its properties like below:
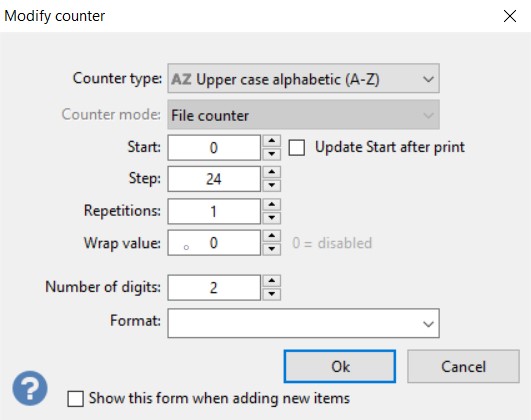
This counter starts for 0 (which in alphabetic values corresponds to letter A), increases by 24 units each label, and is displayed with 2 digits (or letters in this case).
The second counter will be exactly the same, only it will start from 23 (which is the 24th item since we’re starting from zero).
This is the resulting concatenated text:
On applying the changes, here is the result:

Now we add more information using references.
We would like to add the date and time of printing, the total number of printed labels, and the name of the computer that generated the printing.
Add a new text element below the existing one and change the text as follows:
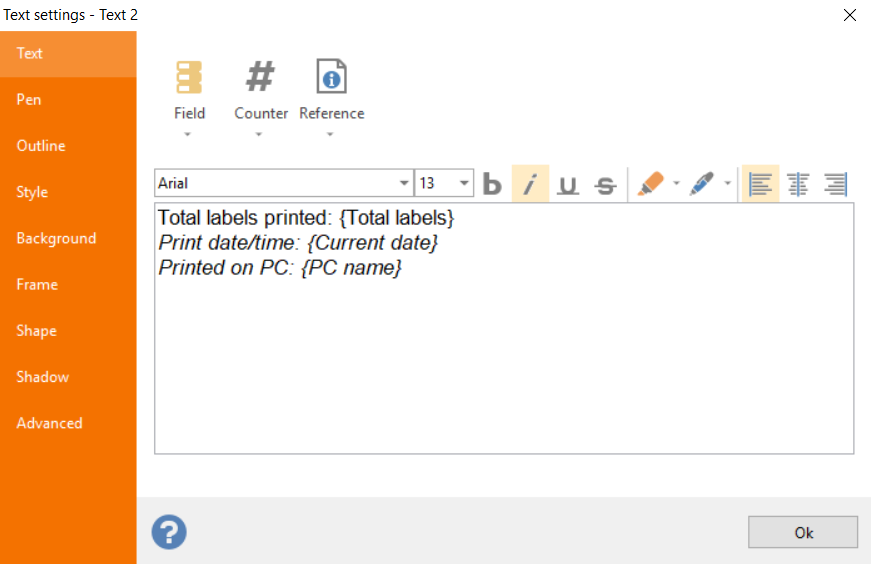
This text contains 3 references: total number of labels, current date/time and name of the computer. All of these references have been added from the pop-up menu, which is displayed by clicking the Reference button.
We leave all references unchanged except for the current date/time. Click on it and change the format as follows:
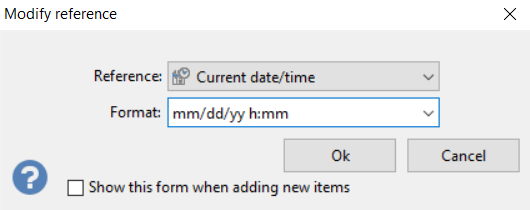
As you can see, we have specified a specific format with which date and time will be shown. It is the US date format (short year with 2 digits) followed by the time in hours and minutes (the letter n is the placeholder for the minute value).
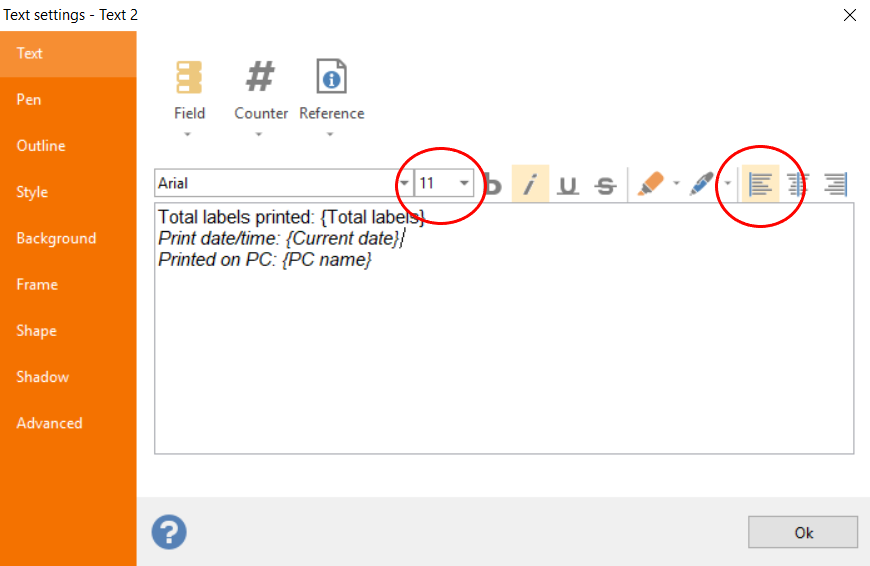
Click OK to confirm the date format. Before confirming these text changes, we reduce the size of the font to 11 points so that the text fits on the label and align the text to the left:
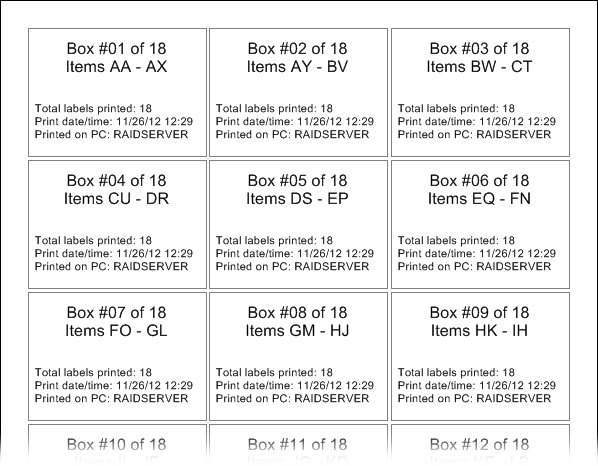
And here is the final result, keep in mind that the fields Print date/time and Printed on PC will vary depending on the current date and the Windows PC name you will be using:
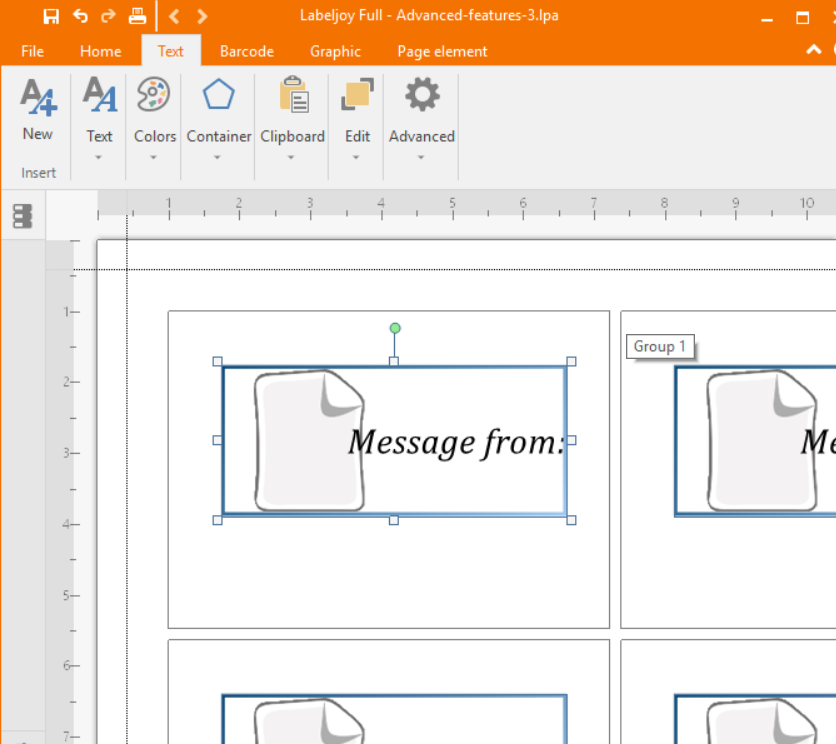
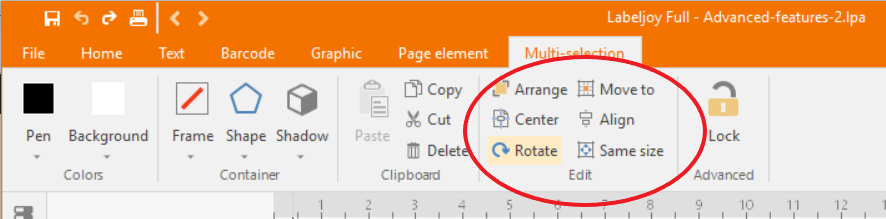
Multi-selection commands
Labeljoy features several multi-selection commands to help you design your labels.
These are:
- Cut, Copy and Paste on multiple items.
- Align, size, center, rotate and move multiple items.
- Change font (text elements only), fore color and back color on multiple elements.
- Change the display order of overlapping elements.
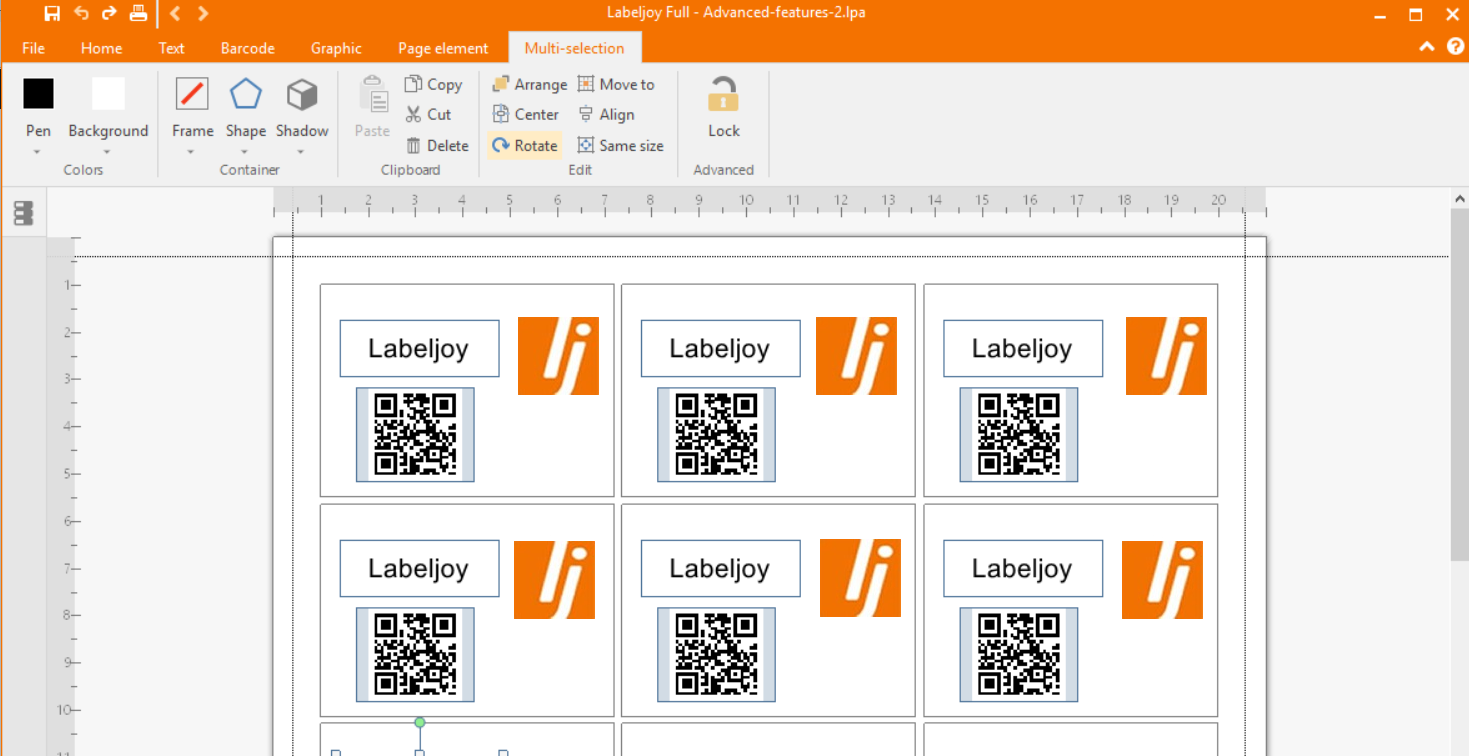
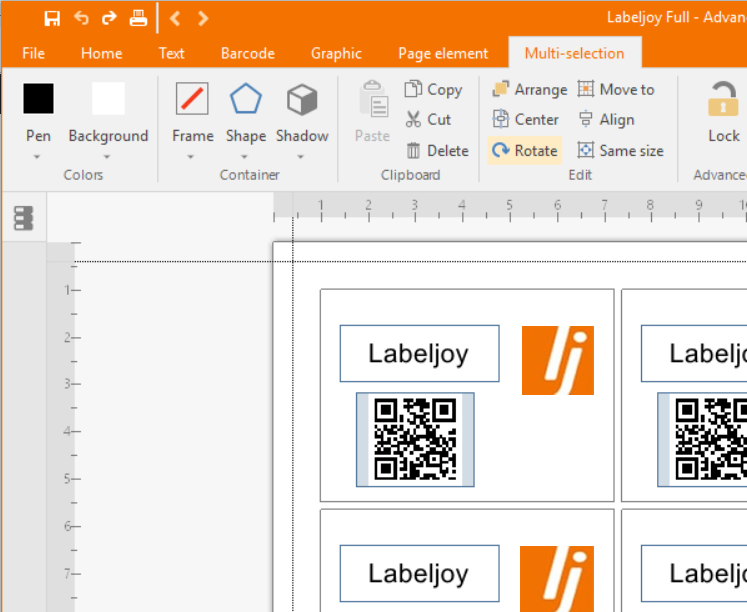
Multi selection in Labeljoy is achieved by clicking two or more elements while holding down the CTRL key, or by drawing a rectangular marquee on the label. When the left mouse button is released, all elements fully or partially covered by the rectangle will be selected:
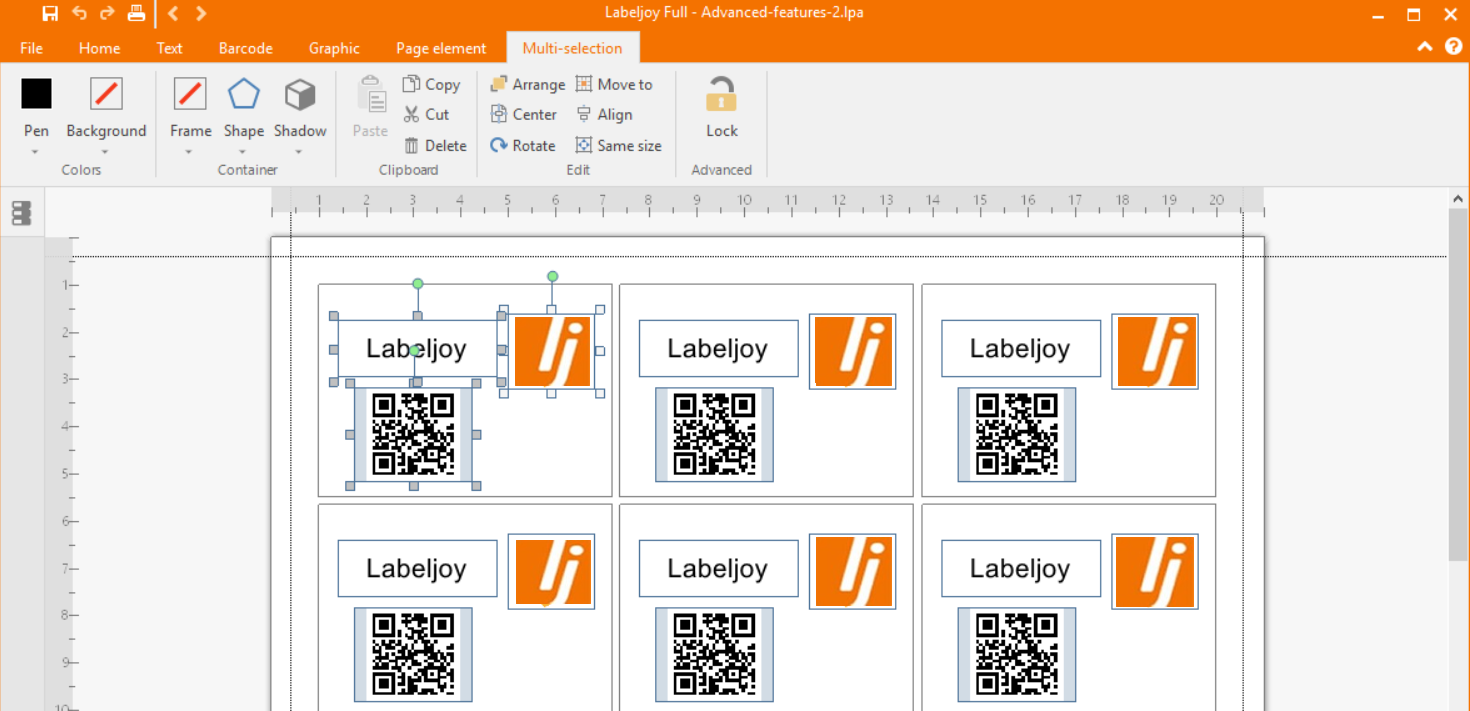
As you can see in the screenshot above, we are drawing a rectangle in position 1 starting from an empty area in the top-left corner and moving toward the bottom-right corner. The label has three elements: a text, a 2D barcode and an image. The text is the only element fully covered by the selection rectangle, yet all three elements will be selected once the left mouse button is released:
We can now experiment with the available multiple selection commands.
First we use the Copy/Paste commands with the Toolbox buttons:
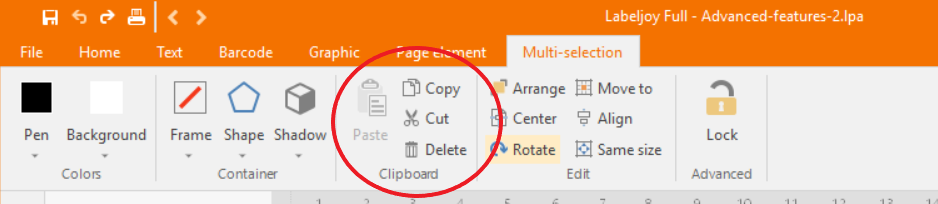
When you click the Cut button (top-left button of the highlighted group in the image above), all three elements are hidden: they have been deleted and copied to the Windows Clipboard.
By clicking the Paste button (bottom-left) they will all be copied back to the label. The Copy button (top-right) will copy all three selected elements to the clipboard without removing them from the label, while the Delete (bottom-right) will remove the selected elements without copying them to the clipboard.
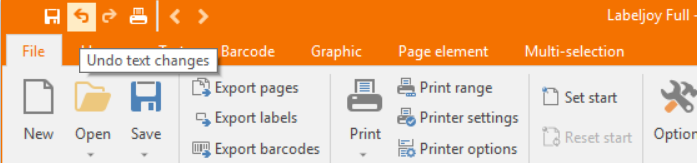
Remember: while editing elements in Labeljoy, you can always go back to the previous editing steps by using the Undo button:
Now we experiment with coordinates, size and rotation.
Selec.t the text and the barcode element, while leaving the image element unselected:
The lower section of the toolbox contains the buttons that display the context menu we need to modify coordinates, size and rotation:
The top-left button displays the Align context menu. This menu is divided into two sections: the upper section for horizontal alignment and the lower section for vertical alignment. By selecting the Align left menu item, the two selected elements will be perfectly left aligned. The left coordinate will be matched with the last selected element. So, for example, if you select the text first and the barcode second, the left alignment will move the text element to match the left coordinate of the barcode element, the last one selected.
The Align Horizontal command centers all selected objects based on the center position of the last selected element. This works the same way for the vertical commands.
The top-right button displays a context menu that enables you to make all selected elements have the same, width, height or both. Again, when using these commands on multiple elements, the reference size will always be the last selected element.
The lower left button provides access to the Center/Rotate commands. In the upper area you can center all selected elements in the label area. In this case, the term Center refers to the area of the label.
In the lower area you can change the rotation angle of all selected elements. The menu list shows the most common angles of rotation (45 °, 90 °, 180 °, etc.). You can define a custom rotation angle and reset the angle to zero.
Last but not least, the Move to button displays a menu that enables you to automatically move all selected elements to one or more of the label margins. The upper section displays four commands to move each selected element to one of the label borders without changing their size, while the lower section acts on the size of each element.
How can you change the appearance of several objects at once?
Once a multiple selection has been made, you can use three specific menu items that allow you to change the foreground color (the text color for text elements, the color of the barcode and the color of the lines of graphic elements), the background color (the background color of all element types), and the font for text elements.
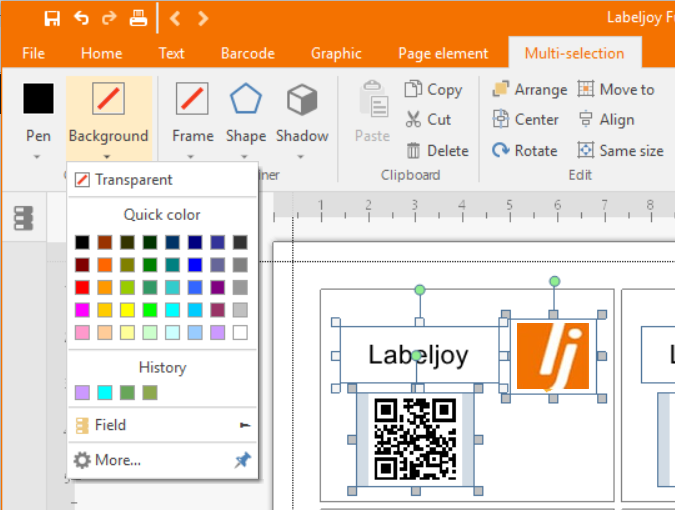
By clicking the Element button in the top toolbar, the menu shown in the above picture is displayed.
Select all three elements of our example file and click on the Background color menu. A color selection dialog appears, allowing us to specify a color.
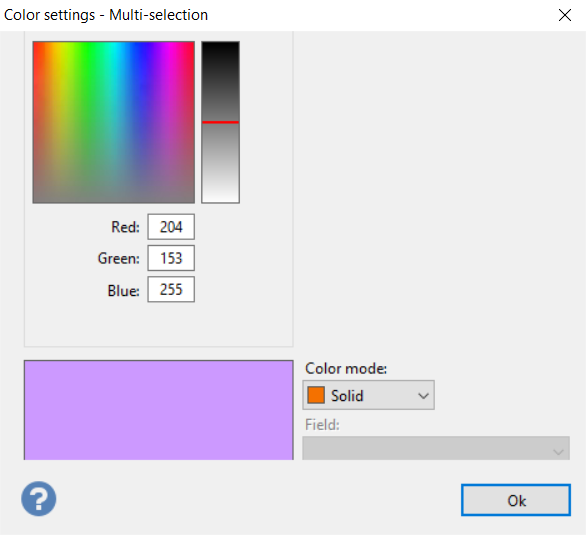
Once you have defined a color, click Ok and the color is applied as the background color for all selected elements simultaneously:
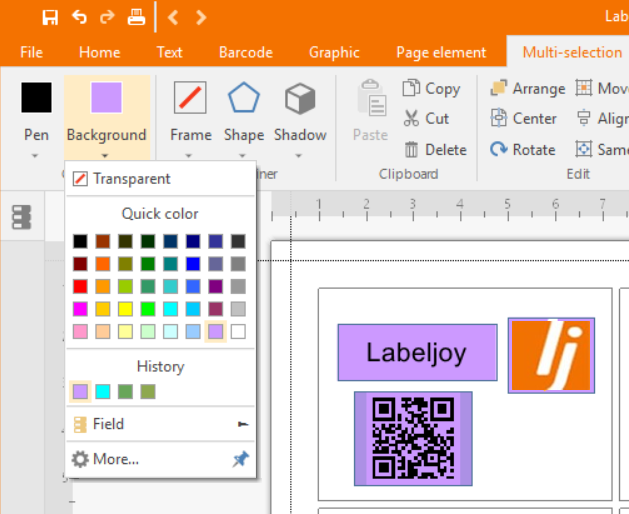
The same concept applies to the font and foreground color commands – the changes apply to all selected elements.
Finally, let’s see how we can change the position of overlapping elements.
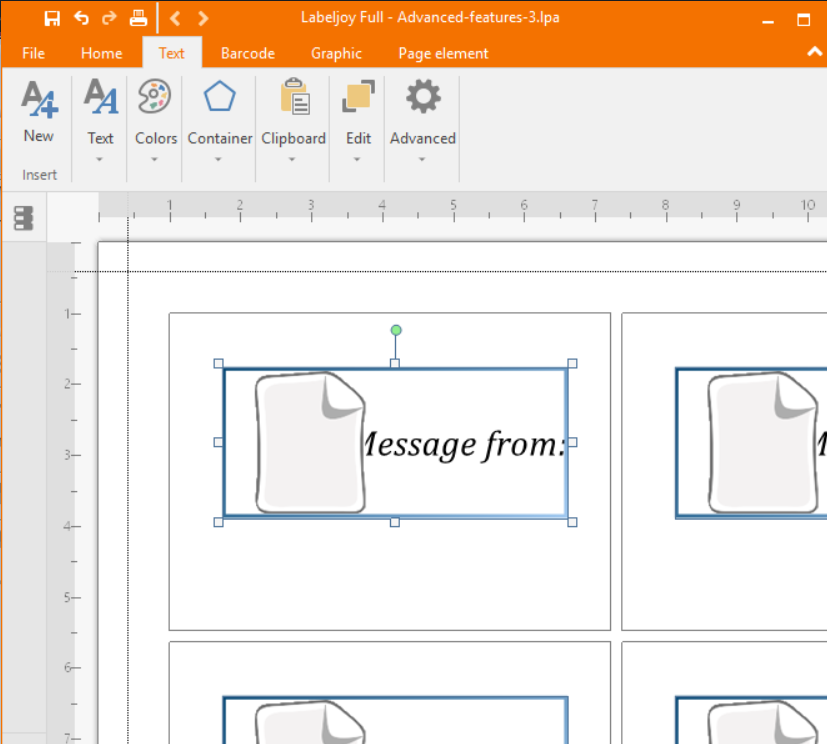
Suppose you have an image in your label and you want to add some text over it. You have added the text first, then you added a graphic element that contains the image you want to display. Like the screen shot below, you’ll end up having a partially or completely covered text, since every time we add a new element in Labeljoy, this is always placed on top of everything else:
In cases like this, we need to select one of the elements and use the Bring to front or Send to back commands found in the left toolbox:
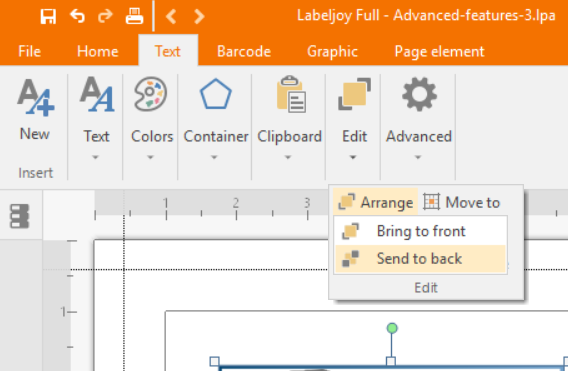
In our example we can select the image element and click the Send to back button to move the element to the back of the text: