How to integrate Labeljoy into your data management software
Software integration
If you want to add label printing to an existing software structure, whether it is a simple Excel file or a corporate ERP system, here are some guidelines for integrating Labeljoy in your existing desktop application setup.
1 – The basics: print shortcut
If you have already created your labels and only need to print them, it is not necessary to restart Labeljoy every time.
The easiest way to print a Labeljoy file is by creating a Print shortcut.
Once you have loaded a file that you need to print often, go to File/Save and select Save print shortcut on the desktop:
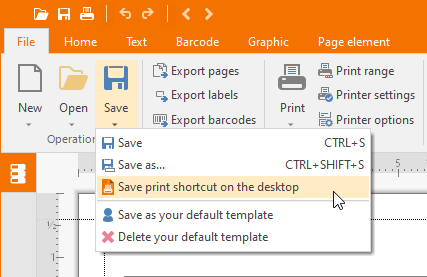
This will create a shortcut on your desktop with a special icon that, when double-clicked, will run Labeljoy in the background just to send the file directly to the printer.
Labeljoy always creates these shortcuts on the desktop but, once created, they can be placed anywhere on your disk. They will work as long as you don’t change, delete or move the original labeljoy file they point to.
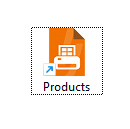
You now have a double-click print shortcut for your most used labels.
It might also be useful to rename your shortcut so that its meaning is easily identifiable.
2 – Printing labels with data connections
Labeljoy enables you to display data from external data sources on the labels, such as Excel files, Access files or professional database systems such as SQL Server, Oracle, or MySQL. Please refer to this video tutorial for more information.
If your labels have to be updated before printing, you have to enable the Update data when this file is loaded or printed option, which you can find in the Group settings form.
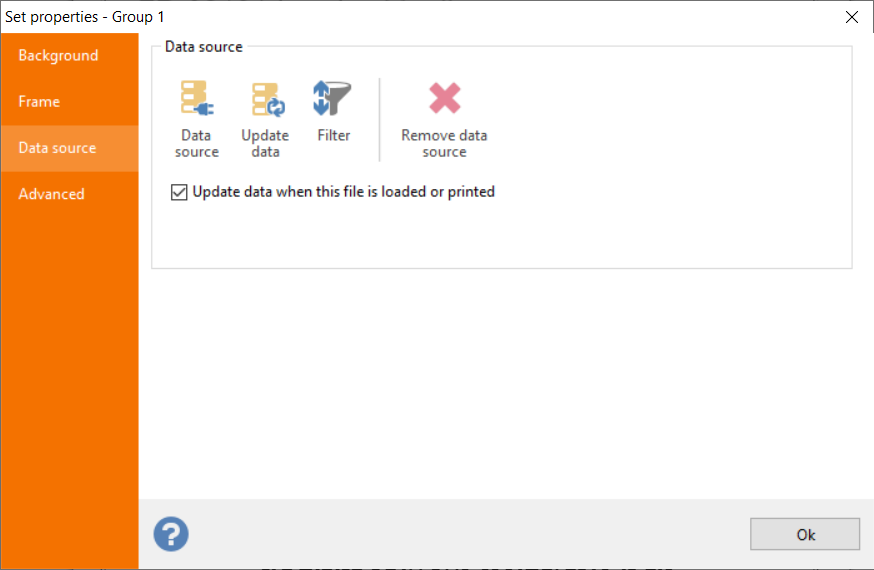
This option updates the data whenever the file is loaded or printed. The data is reloaded with the parameters entered during the first connection. In this case, the file C:\Logistic label.xlsx and the worksheet Logistic labels must exist, otherwise the data updating will fail.
This option enables you to print labels with the latest data available. So if the print shortcut we created earlier points to a data connected – auto updating Labeljoy file, all you have to do is click it when new data is available for printing.
IMPORTANT: Labeljoy stores the name of the printer used to print each file. This means that the printer used for 1-click printing will always be the same as the one previously used.
3 – Excel integration with VBA
If the data to be printed is stored in an Excel file, a print shortcut can be created by using the Visual Basic for Application (VBA) programming language within the very same Excel file.
This requires some programming knowledge and knowledge of the VBA environment.
For this we will use a variation of the files created in the GS1-128 tutorial.
We assume that both files are located under the root directory of the C drive, C:\.
First, open the Labeljoy file and make sure the option Update data when loading or printing this file is checked, as described in the previous chapter.
If the linked Excel file is stored in a different location than the root of the C: drive, make sure to update the location in Group settings/Data source.
Save the Labeljoy file and close Labeljoy.
From this moment on Labeljoy can remain closed, we just have to take care of the data to be printed.
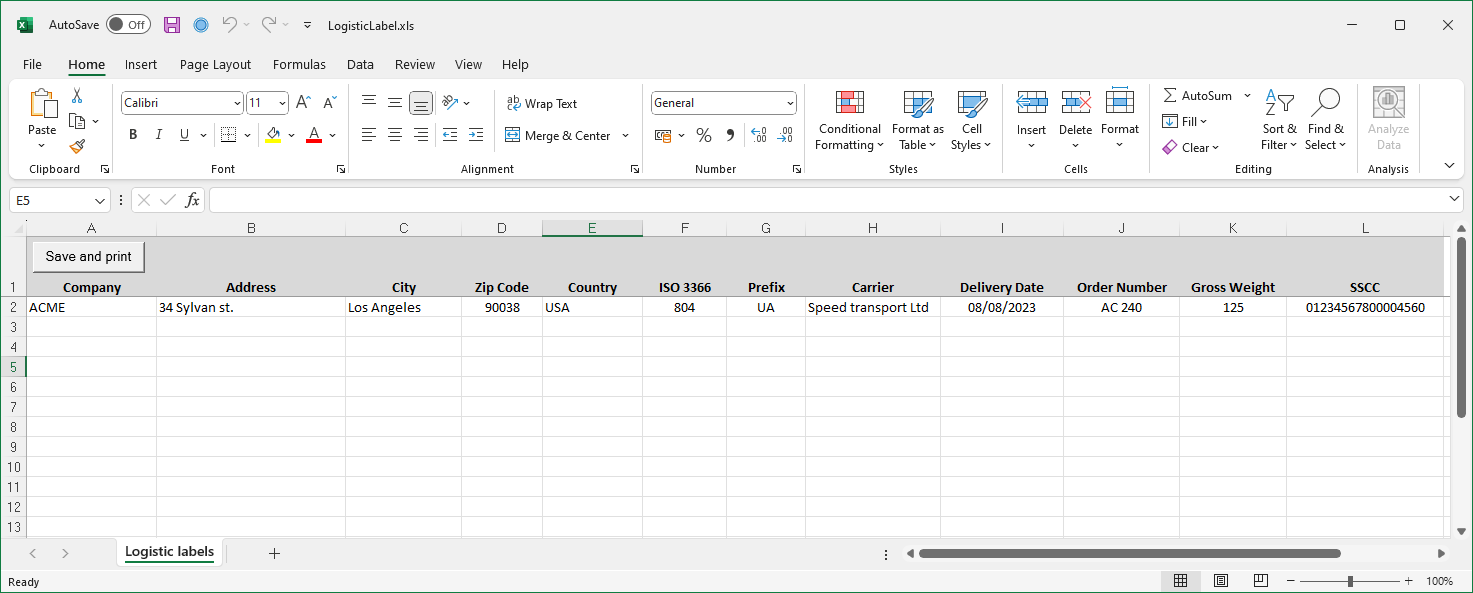
The Excel file contains a single row of data and a button linked to a VBA Macro:
We now open the Excel file and the VBA editor by pressing ALT + F11. This gives us an insight into the processes in the background:
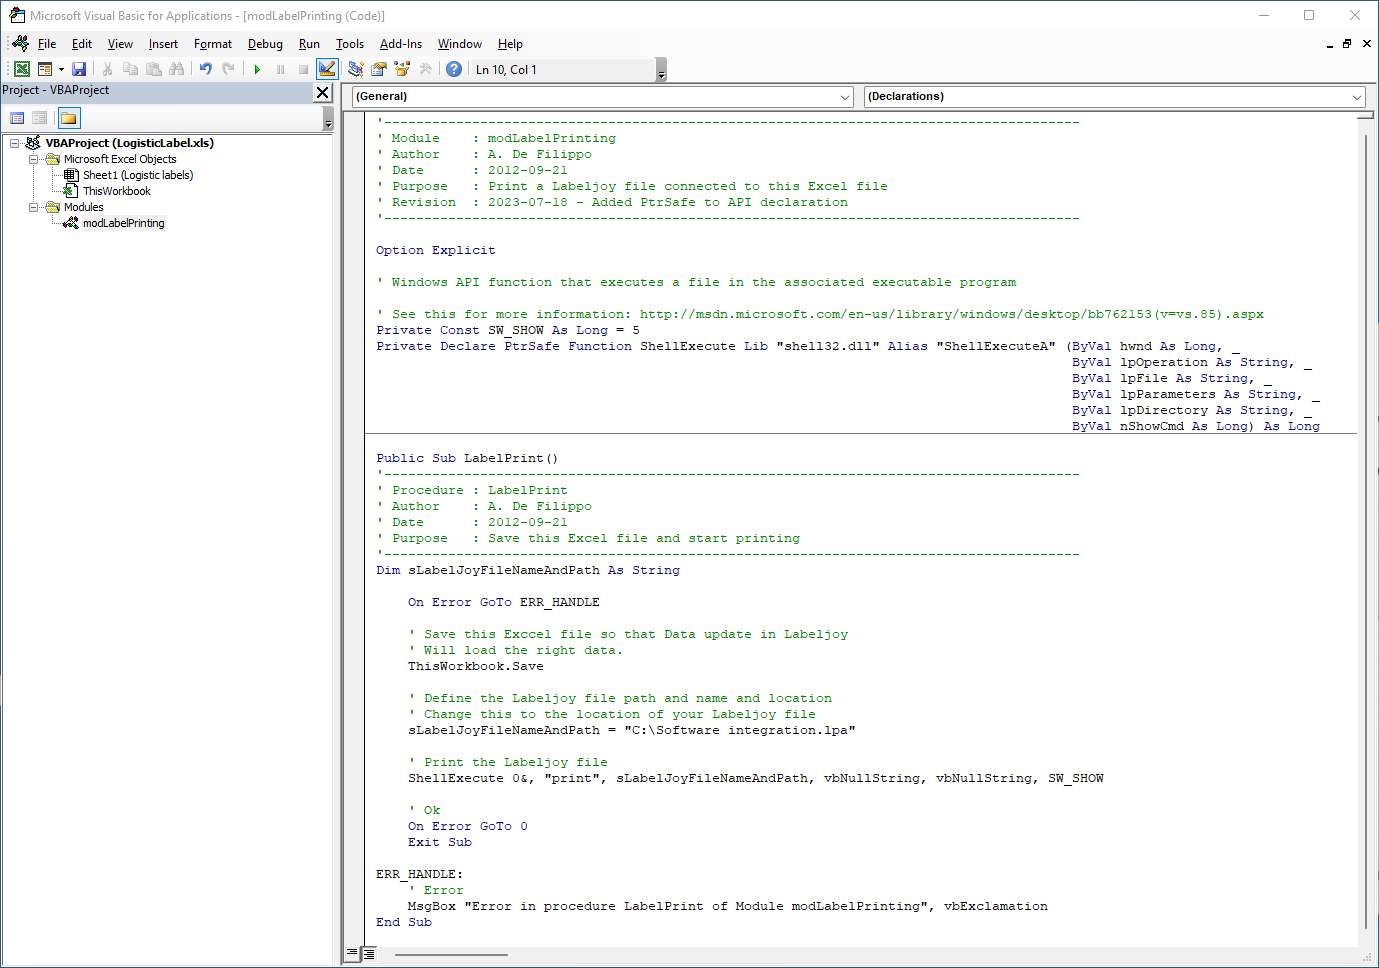
The modLabelPrinting module contains a single routine named LabelPrint. It is a simple macro that first saves the Excel workbook and then executes the Labeljoy file for printing. This last step is achieved through the use of the ShellExecute Windows API function (more information on the MSDN website).
If the Labeljoy Software integration.lpa file is not located in the root of the C: drive, make sure to change the file path accordingly:
sLabelJoyFileNameAndPath = [Enter the correct file path with quotes here]
When the Save and print button is clicked, the Macro is executed: the Excel file is saved and the Labeljoy file is first updated and then printed.
Try changing the data in the Excel file and click the button to see the resulting printed labels.
4 – Integration in an ERP system
If your company manages its data in an ERP system developed and maintained internally, you can apply the previous approach by writing a corresponding routine using the programming language of your choice.
The only requirement is that Labeljoy is installed on the computer from which the labels are printed.
Following a sample application written in VB.NET (Visual Studio 2022, Framework 3.5). The code should run on a computer with Labeljoy 6 installed.
This example requires basic knowledge of the VB.NET programming language and some knowledge of ADO.NET.
When the application is run the first time, it copies two files that are stored in its resource area:
- Logistic label.mdb. An Access database file containing two tables: The Logistic Label table used to hold the data that will be printed. The ISO3166 table which contains country data identifiers, needed to properly handle the fields Country Code and Country Prefix.
- Logistic label.lpa. The Labeljoy file to print. This file contains data associated with the Logistic Label table of the MDB file.
Both files are saved in the Labeljoy folder under the Documents folder.
The application consists of a single form that collects the required data for the logistics label:
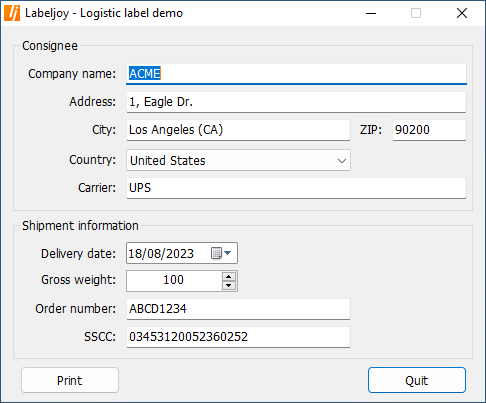
Once the form contains the data to be printed, the user has to click Print.
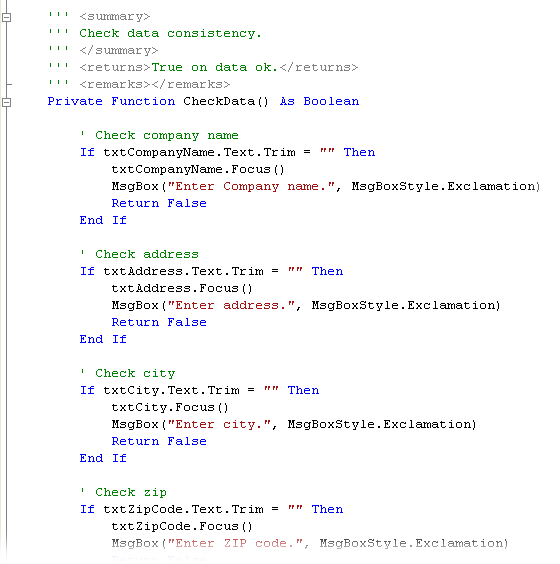
The data entered is first validated in the CheckData function. If any incoherence is found, a message box is displayed. Printing will not be performed unless all errors have been resolved. Please find more information in the comments:
Once the data has been validated, it is stored in the Logistic Label table of the MDB file via the Update Data function. As you can see in the code, a Delete statement is always issued before the new data is stored. For this example, we only need one data row in the source table:

Then the label is printed using the ShellExecute Windows API approach:
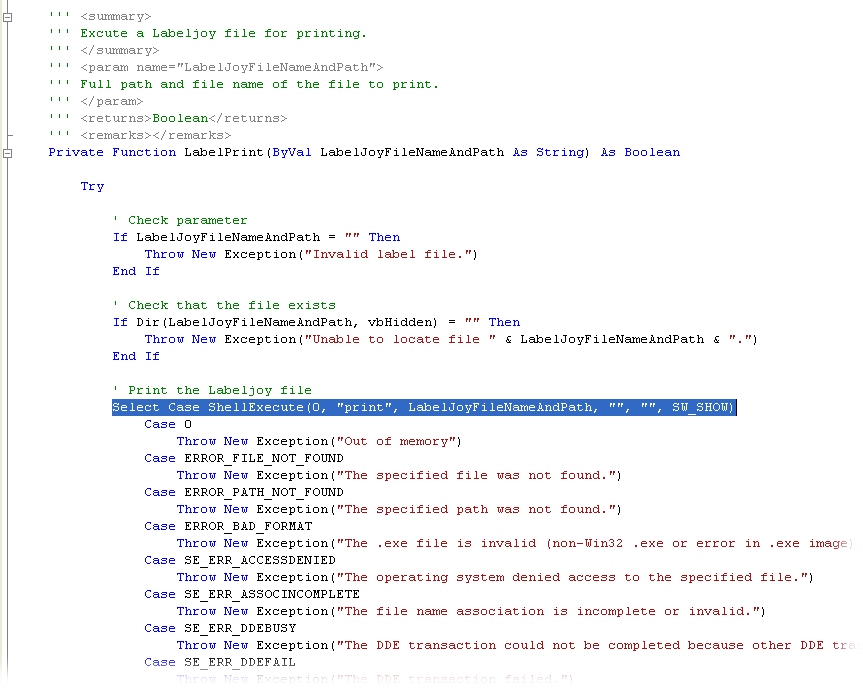
The Logistic label.lpa file is loaded into Labeljoy and the data is updated by reading the newly entered data from the MDB file. After printing, Labeljoy shuts down.
The data update process is made possible by a hidden Labeljoy function: If a Labeljoy file is linked to a data source that is originally stored in Labeljoy’s Document folder (Documents/Labeljoy), future data updates will always refer to a path within Labeljoy’s Document folder, even if it changes.
For example, suppose you link a Labeljoy file to a data source in C:\Users\John\Documents\Labeljoy. You then move the Labeljoy file and the data file to a different PC. This time, since it’s a different user, Labeljoy’s document folder will be C:\Users\Mary\Documents\Labeljoy. When Mary opens the Labeljoy file and data updating takes place, Labeljoy recognizes that the original data source was found under Documents/Labeljoy and adapts the path according to the current user’s documents directory in the current machine.