automatic element positioning
During the editing phase it is often necessary to position elements relative to the size and position of other elements. The Edit group on the ribbon provides access a series of functions that enable you to move and resize elements quickly and automatically.
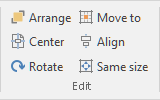
The Arrange button enables you to:
- Bring to front: Bring the selected element(s) on top of all others.
- Send to back: Send the selected element(s) behind all other elements
The Center button provides access to the following commands:
- Horizontal: center element(s) horizontally within the label (for label elements) or the page (for page elements).
- Vertical: center element(s) vertically within the label (for label elements) or the page (for page elements).
- Both: center element(s) both horizontally and vertically within the label (for label elements) or the page (for page elements).
The Rotate button displays the following commands:
- Rotate 45°: Add 45° to the element current rotation value.
- Rotate 90°: Add 90° to the element current rotation value.
- Rotate 180°: Add 180° to the element current rotation value.
- Rotate 270°: Add 270° to the element current rotation value.
- Rotate freely: Display the rotating window enabling you to define a custom angle and whether the angle should be added to the current rotation or made absolute.
- Reset rotation: Reset the current rotation angle to 0°.
The Move to button provides access to the following commands:
- Left border: moves the selected element(s) so that the element left border is aligned with the label left border (or the page left border for page elements).
- Right border: moves the selected element(s) so that the element right border is aligned with the label right border (or the page right border for page elements).
- Top border: moves the selected element(s) so that the element top border is aligned with the label top border (or the page top border for page elements).
- Bottom border: moves the selected element(s) so that the element bottom border is aligned with the label bottom border (or the page bottom border for page elements).
- Width: resizes the element so that its width becomes as large as the label width (paper width for page elements).
- Height: resizes the element so that its height becomes as large as the label height (paper height for page elements).
- Both: resizes the element so that both its width and height become as large as the label width and height (paper width and height for page elements).
The Align menu provides access to the following commands:
- Left: aligns elements to the left border of the last selected element.
- Right: aligns elements to the right border.
- Horizontal: aligns element by centering them horizontally.
- Top: aligns elements to the top border.
- Bottom: aligns elements to the bottom border.
- Vertical: aligns element by centering them vertically.
The Same size menu provides access to the following commands:
- Width: makes the width equal for all selected elements.
- Height: makes the height equal for all selected elements.
- Both: makes both width and height equal for all selected elements.
- Horizontal spacing: when 3 or more elements are selected, distributes horizontal spacing evenly between elements.
- Vertical spacing: when 3 or more elements are selected, distributes vertical spacing evenly between elements.
Note:
The Align
and Same size
menus enable you to act on
multiple selected elements
to change position and size. To select more than one element,
click the elements while holding the CTRL key.
The modifications will be applied by using the coordinates of the last selected element
as reference.