print
This tab enables you to define printing options. These settings affect label printing.
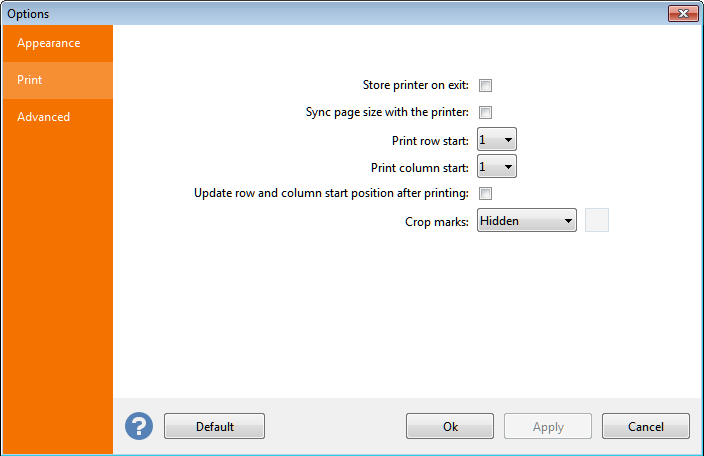
Store printer on exit:
By activating this option you instruct Labeljoy to store the last used printer between sessions. The next time Labeljoy runs, the printer selection and settings will be automatically restored to the last used, regardless of the default printer setting in the system. This option is particularly useful on systems where more than one printer is installed, and one of them is dedicated to label printing.
Sync page size with the printer:
This option, when activated, ensures that all changes made to the page format in the layout
dialog box will be applied to the current printer settings. Vice-versa, when the printer dialog box is displayed and a change is made to the paper format, all changes will be reflected to the current layout.
Printing start position:
Labeljoy enables you to define a printing start position
on the first page other than the top-left position normally used when printing multiple row/column label sheets. This functionality is particularly useful when you want to start your printing job on a label sheet that is partially used, enabling you to fully use all those label sheets that have not been completely printed.
Here you can define the row and column coordinates
that control where the printing should start. For example, if you want to use a label sheet made up of
3 columns and 8 rows of labels, where the first 5 positions were previously printed, you will instruct the program to start the next printing job on row 3, column 2, so that printing will begin where the first available label is.
The options are:
- Print row start: definition of the label row where printing should start.
- Print column start: definition of the label column where printing should start.
- Update start position after printing: by activating this option, Labeljoy will automatically set the printing start position after each print job to match the unused labels left in the last printed sheet.
|
Note:
The printing start position can also be set using the mouse. See the setting the print start position
topic.
Crop marks:
Crop marks can be optionally printed on each page in case it is necessary to cut the printed sheets. The combo box Crop marks
enables you to set the way crop marks are printed:
- Hidden: crop marks are hidden and do not get printed.
- Fixed length: crop marks are printed, and their length is fixed at 1 inch (2.54 cm).
- Margin length: crop marks are printed, and their size is dependent on the outer margins defined in layout
from.
- Page size: crop marks are printed using the whole page width and height.
Note:
To ensure that the option Margin length produces a visible effect during printing, it is necessary that the outer margins, set in the layout dialog box, are large enough to exceed the printer margins. Otherwise some crop marks may not be printed.
You can define a color that will be used to print crop marks by clicking the Crop marks color
box.